
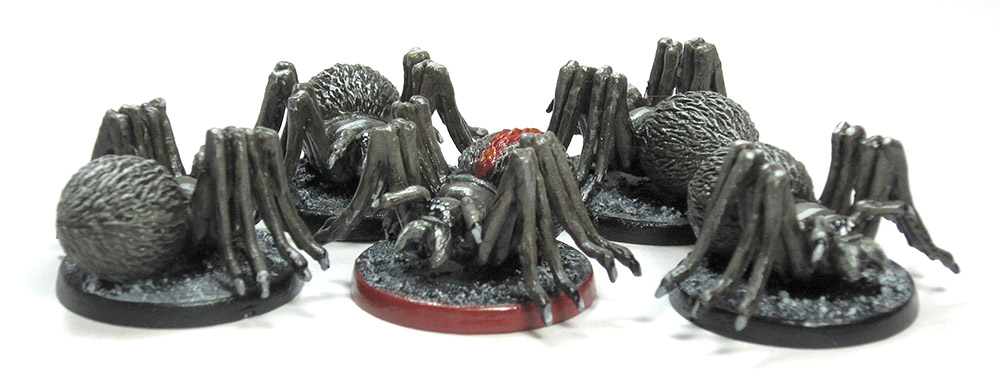
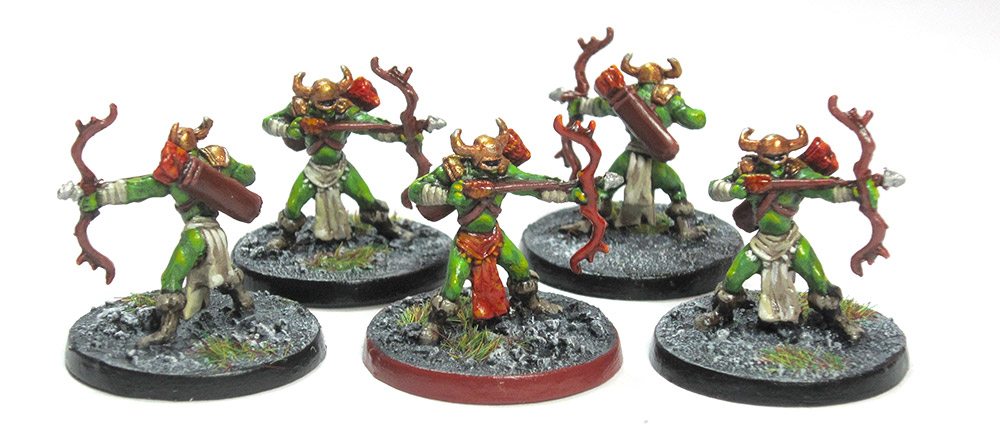
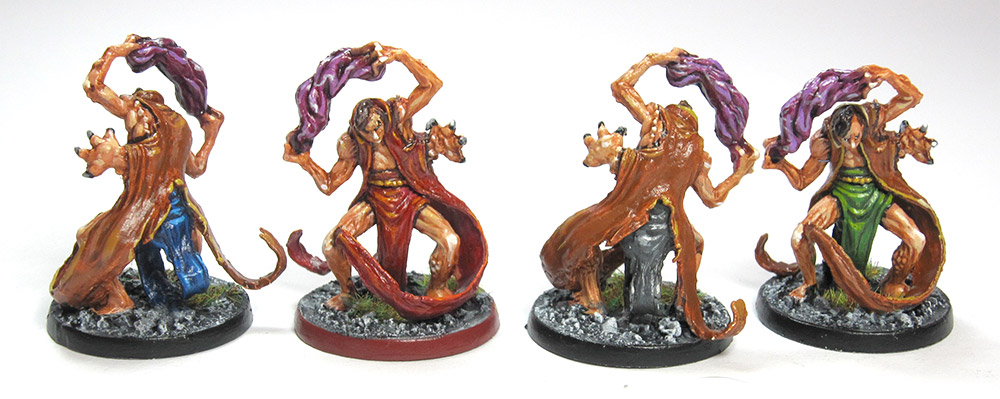
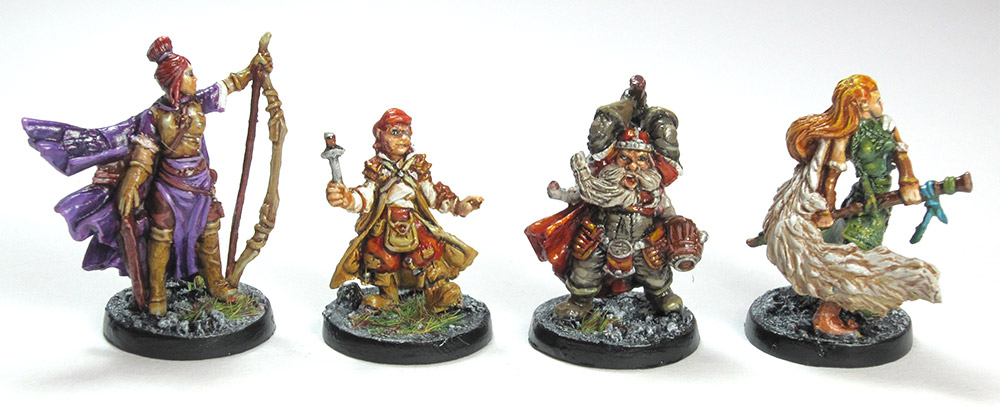
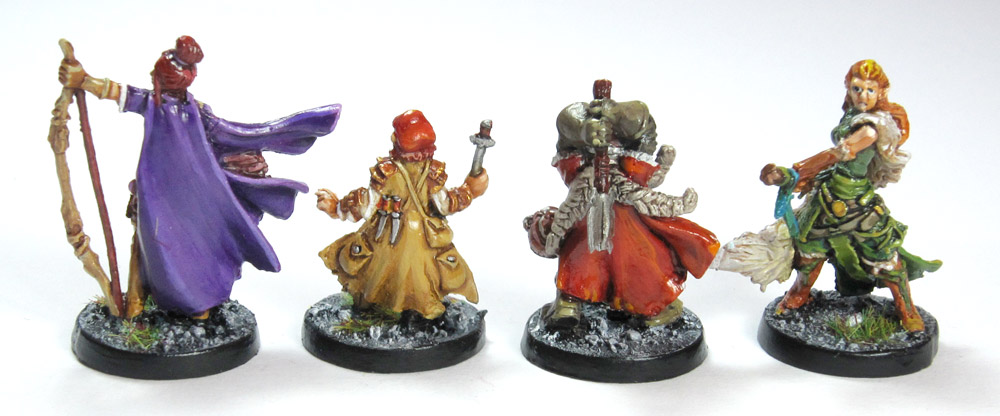
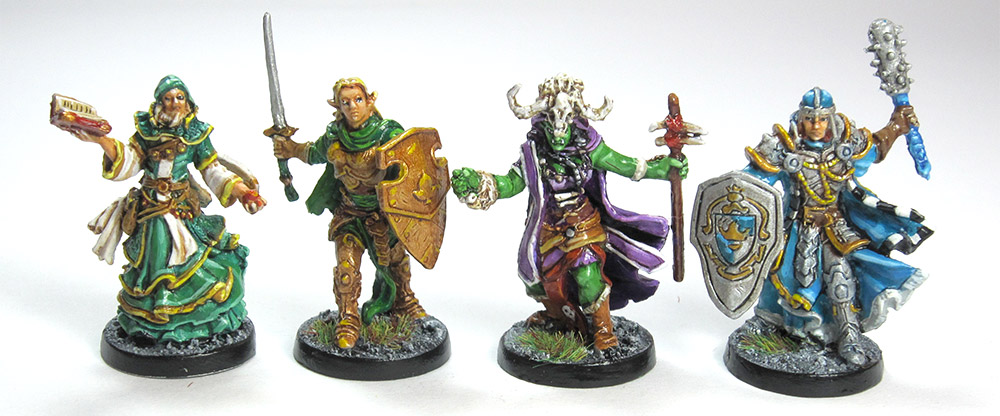
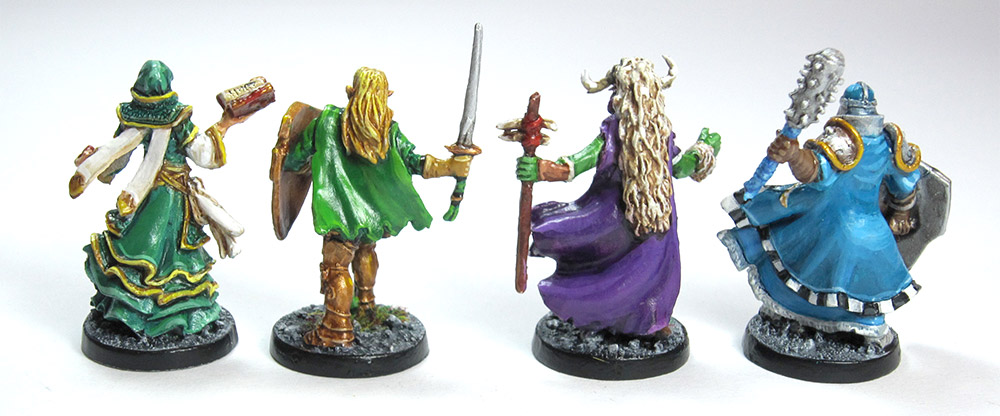
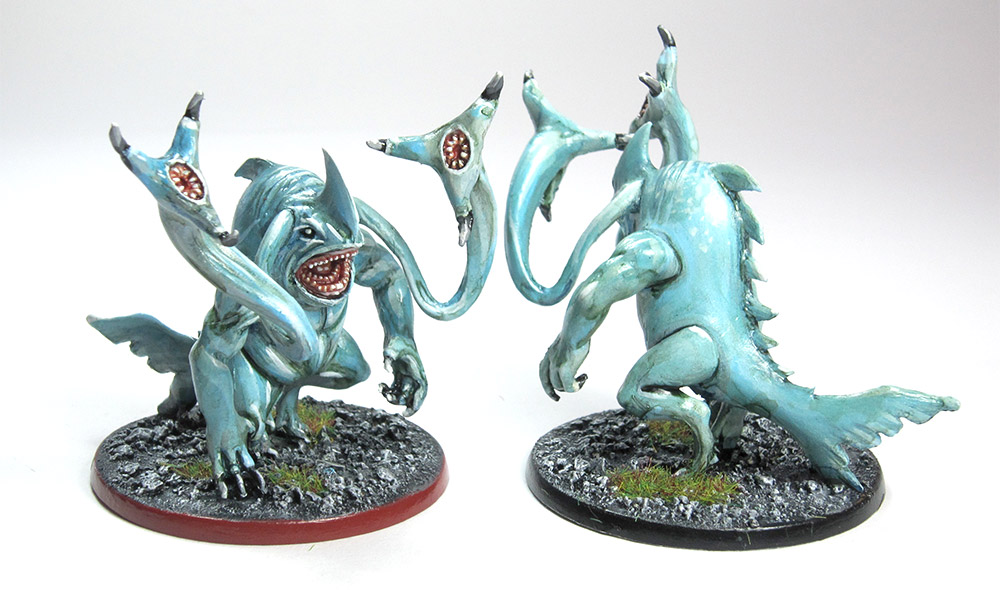
For those of you painting the figures from Descent 2nd Edition (come on, hurry up, we’re almost three expansions in already!), here’s a little reference guide if you’re looking for some inspiration and some ideas for colour schemes.
Just click on the images if you’d like to see larger versions.
There’s nothing particularly original about the colours I chose for my figures; they’re a mixture of ideas nicked from photos on BoardgameGeek and using the game cards as a guideline. Of course you can paint your figures any way you prefer. No secret colour conformity squad will be dispatched from any one of the many underground headquarters of the EOG scattered around the world to raid your bedroom at night and force you to repaint them in the archetypical colours … I promise. Really.
Oh, and one more thing. These have been coated with a semi-gloss varnish, which looks good and protects the figures when you’re playing the game with them but tends to make the figure look very glossy under lights when you’re taking photographs of the little buggers.
The Painted Miniatures


What type of ballast (rocks) are you using on those bases.
Crushed kitty litter. This and any other other basing questions are answered in the EOG Basic Basing Tutorial!
Your painting skills are nothing short of miraculous. I feel unworthy. That is all.
That’s a lovely thing to say Sanjay but really, I’m not doing anything special here. Basic techniques, a steady hand, and a bit of experience, that’s all. 🙂
hey there, i know we’ve chatted on Twitter about this, but the tip on using clay cat litter is absolutely genius. it takes a little holding yoru breath and trusting to the magic of PVA as i thought i’d ruined the bases when i first tried sealing the bases after application of the litter and it was nice and dry. the diluted PVA looked soooo wet and gloopy and it was a nail-biting few hours before the PVA did what it should, the glue tried out completely and shrunk back to a thin film. Now they look brilliant. I added a few bigger chunks of litter by hand after sealing with normal cement and then painted and dry brushed those (as per your tutorial vid) and they looked fantastic to me.
thanks for everything
paul d
Ahh, it’s posts like these that make it all worthwhile. Now as long as we can all weather the inevitable kitten backlash all will be well.
Thank you for the reference material and the kitty litter guide. Has helped a great deal. 🙂
Glad to be of service!
Nice work. I painted Avaric, Syndrael, and Leoric for a friend of mine recently, and Syndrael was really hard to keep feminine (or at least gender neutral) because of the sculpt. I had to redo the face a few times because each time it just looks very masculine. I finally achieved gender neutral, but wasn’t as good as what you did.
Once again, nice work 🙂
Thanks Kal. I’ve since got myself a head loupe, which I find very handy for painting fine detail.
Hello again UniHead!
I finally got all my supplies put together to start painting my Descent 2E minis. I decided to start with the larger and less complex Ettin figures. After scrubbing them with soap and a toothbrush, my first step was to do the basing (like you demonstrated in your videos on your Deadzone figures). However, once the sealing layer of glue dried and I was ready to prime the figures, I noticed the entire basing that I had put down began to peel up off the base. This was frustrating because at that point it all just snapped right off the base, kind of like peanut brittle.
Backing up a bit, I originally went on a hunt in my local stores for kitty litter that was clay-based (I do not own a cat). Unfortunately I could not find any litter that fit the bill. Everything was scented or had strange crystals things in them. In addition, I found that litter around here is sold in huge amounts like 14 lbs (6 kg) bags. So I decided to try a different route and bought a small container of fine basing grit. It turns out this grit has larger pieces than I expected (they are all uniform in size though).
So I found that using the basing grit does not work so well on these slick plastic bases. Perhaps I need to thoroughly score the base first so the glue has something to hold onto? It sounds like a finer powder material has less issues sticking to and staying on the base. I am now wondering if there is an alternative material I can use besides kitty litter. Could I mix a bit of basing grit granules into something more powdery like baking soda? Maybe that would prevent the peanut brittle effect? Any ideas or advice would be a great help to get me back on the right path for painting these mins. With great frustration, I’m basically starting over from scratch after the peanut brittle incident.
As a side note, my figures have the same affliction on the large bases that I see in your Ettin photos above. For some reason, the red plastic figures have bases that are prone to curling up along the edges. Perhaps the plastic is too soft. I attempted to fix this issue by dipping the base in water that is just off boil, then reshaping it on the edge of the kitchen counter to try and get it to stay flat. Once shaped I let it sit in ice water to set it in place. All of this seemed to work fine until I noticed that it was curling again after I had put basing material on it. Any ides or suggestions on how to keep the base from curling up? I wonder if a better alternative is to cut the figure off the base and glue it to a better base (though that sounds too labor intensive, I just want to play the game!)
I’m determined to get my set painted, I just need to get past the challenge of basing the larger figures with their curling bases and unwillingness to accept a couple of layers of grit and glue.
I appreciate any ideas or help from any of the members of the EOG!
Thanks!
Greetings!
Strange that you can’t get small bags of clay litter. The reason I don’t use basing grit (for example the Games Workshop stuff) is not only the cost, but the uniformity of the grit. The alternative material is sand, which I used for a long time, though it also can be a bit uniform. Scoring the base however is a good idea and will give it something to cling on to (I may have done it myself with these large bases and forgot to mention it … it was a long time ago but I vaguely remember in this one case scoring them in response to the same problem).
As you say, this doesn’t seem to be as much of a problem with kitty litter (and smaller bases) but it’s probably a good habit anyway for that bit of extra strength.
All part of the fun! Experimentation is part of the process, you’re always going to have a few ‘incidents’. You’ll soon leap over these first small hurdles and forget about them. 🙂
The large Descent bases do curl a bit, even after the hot water treatment, though I’ve got them flat enough so it’s not a problem. Attaching them to new bases would be pain – just paint those buggers and get playing! 🙂
Good luck!
Thanks for the reply!
Your advice is always helpful. I think I will try to use sand and maybe mix in a bit of the grit to give the basing some variation in texture. I will also give the large bases a good scoring so the glue will hang on better. I’ll let you know how it goes after I get these figures painted.
Thanks!
I sometimes use granulated terrain mixed with vinyl glue to obtain a sort of “cement” which I spread on the base, then seal everything with a coat of more vinyl glue.
Hey there, I’ve recently bought the game and would love to start painting the miniatures but wouldn’t know which citadel paint colors to purchase, do you perhaps have a list of the paints that you used for each miniature?
Hi Geoff. I tend not to list particular colours for several reasons. One, I have a mix of old and new paints so I’d have to keep looking up the new names of old paints (and the colours vary anyway); two, it would take ages to record every paint I use and slow my painting down to a crawl; three, some people prefer to use particular paints in the extensive GW range for shadows and highlights, whereas I often mix colours for the same effects; three, I don’t like to restrict people’s creativity by giving them exact colours; four … well, you get the idea! 🙂
ok, thanks for responding
Hi
Just wanted to say thanks for posting this, I am starting to paint my descent heroes and so will be using this as a reference. And as something to aim for.
Out of interest have you painted any of the heroes (or monsters) from any of the expansions?
Thanks again 🙂
I must admit I haven’t played Descent in a while, after playing through the main campaign. No further expansions painted as yet!
Hi, awesome work! Did you detached the mini from the base to do the basing? If not, how did you do it? Before or after painting the mini?
I always texture the base before priming the whole thing.
Great post thanks for sharing, helps with inspiration for colors! Another idea for bases I use sand/dust and tiny pebbles from my driveway stuck with PVA on the primed bases, then paint straight on them with acrylic. Free and works like a charm 🙂
Righto, we’re all coming over to get some from your driveway. 🙂 Another tip – carefully paint watered down PVA over the base texture to seal it before painting.
Hehe come over, gonna be a long swim to Canada for you 😉 Just watched a bunch of your videos, and did see the watered down PVA tip, sounds good will try next batch for sure! You have a great website here, good videos and great content. Cheers!
Great pictures! I’m just about to start trying to paint my character Syndrael, but I’ve never done any miniature painting. With the two colours, green and yellow/gold, is it easier to work on one colour first (say green) with painting, washing and dry brushing? I’m not sure whether to wash over all or just in colours. Cheers.
Leave your second colour to the one that will let you touch up the first – in this case, you can touch up the bits where you’ve been messy with yellow with green, but it would be hard to do vice versa. Washing is usually left until all your base colours are done and dry.
Thanks so much for that! That’s what I had in my head – yellow as the base colour and green to add later, but didn’t want to mess up my first one!
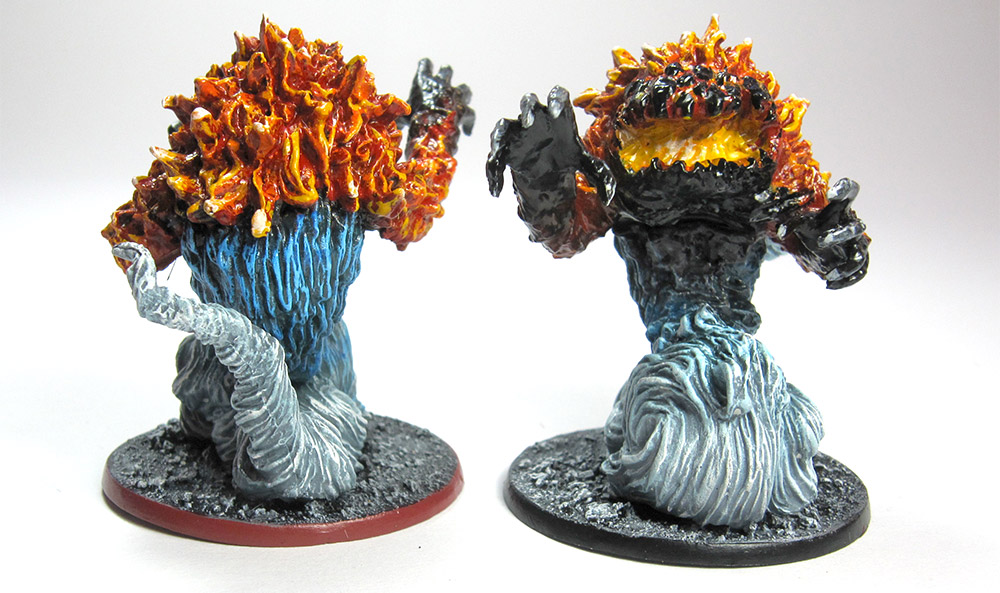
I would really like to know the colors u used. What company, what shades. If u would like to post at some point it would be very helpfull. That elemental though…
Hi Stavris. I’m sorry, but I never specify actual paint names, for several reasons. One, it would slow my painting down to a crawl to keep track of every specific paint I use (especially if I specified shadows and highlights as well). Two, I think the habit of specifying actual colours, which was pretty much started by Games Workshop so they could sell as many pots of paint as possible, limits your creativity and your development as a painter. And three, people use all kinds of paints these days – Games Workshop, Vallejo, Privateer Press, Army Painter – so they should be able to match the colours to any brand they’re using. I happen to use GW paints, but I would never ‘force’ specific colours onto anyone. So this is why I just show photos as a reference – match the colours by eye if you wish, use the photos as inspiration, but pick your own colours and learn about colour and you’ll become a better painter! 🙂
Although they’re not up to the standard of UH, I’ve painted my Descent monsters, but they’re good enough for me. One hero down (needed a cleric for an RPG), so with Lair of the Wyrm I have 9 to go… hopefully done this week, but heroes takes a bit more work than monsters… lots of fiddly bits.
Thanks for the images. Just painted a lot of descent 2 minis and used this site as a reference for the colors. Actually I just copied what you have done here because, why invent the wheel and all that. I don’t know if this is against blogging etiquette, but here’s a link to pics anyway http://finmirage.blogspot.fi/2016/12/descent-20-almost-done.html
I copied from FFG so you’re continuing the tradition; I can never be bothered to come up with my own colour schemes. Nice work!
Apparently my paint job wasn’t total crap as the guy asked me to paint the Nerekhall and Labyrinth of ruin miniatures as well. This time it was easier as I found out there’s a descent Wiki with art for all the monsters and heroes so I copied from there. Here’s a link to images: http://finmirage.blogspot.fi/2017/04/even-more-descent-20-miniatures-painted.html
And this was the wiki, which was GREAT resource: http://descent2e.wikia.com/wiki/Descent:_Journeys_in_the_Dark_(Second_Edition)_Wiki
Very nice – and thanks for the link!