Just like you thieves; always taking things that don’t belong to you.
Lay out the bits of Waterdeep with these Lords of Waterdeep foamcore box insert plans!
Thanks once again to excellent foamcore master Jonathan White, here’s another set of foamcore plans, this time for the excellent Wizards of the Coast worker placement game Lords of Waterdeep. If you’re like me and had put away a store of foamcore, now’s the perfect time to catch up on your insert making! Be sure to have a look at the foamcore plans section of the website for even more inspiration. And thankyou again Jonathan for your contributions!
Remember, if you’re inexperienced in the ways of foamcore, check out my tutorial videos—the links are in the PDF.
Jonathon’s description of this insert:
From someone who appreciates “a place for everything, and everything in it’s place”, the original insert for Lords of Waterdeep is close to perfection. But once the expansion came out, I had to decide if I really wanted two boxes taking up space on my shelves. Also, one issue I’ve always had with the existing insert is how long it takes to put everything away. Specifically, the jewels, coins, and player building markers have to be oriented in the same direction to fit in their slots. This takes time and is quite annoying. Finally, I’ve mentioned before that I prefer to have everything a player needs all in one container. The current insert divided everything up. For all of those reasons, I decided making my own insert was a good idea.
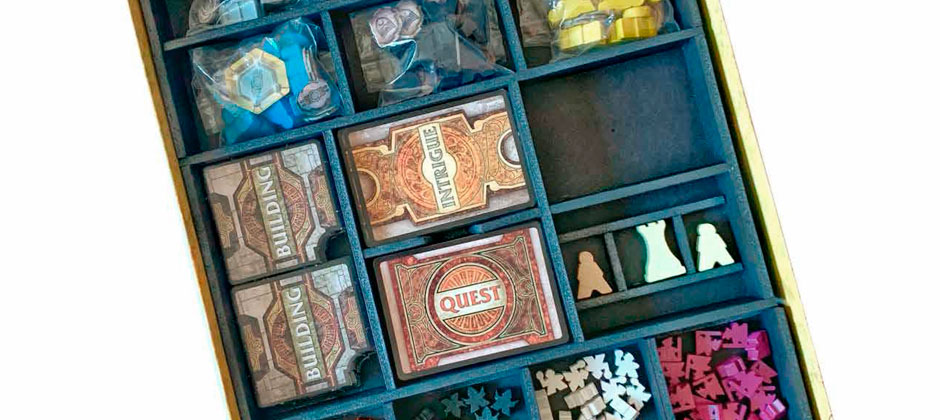
The top level for the LoW insert contains everything for the base game. Underneath the player mats are all the pieces for each player. This really speeds up setup and breakdown.
For the DnDeeples container, I made sure to leave one wall exposed so people could see how many were left while playing. I also have containers for the coins and VP jewels. Originally, I was going to have a larger container for the coins that was to be built under the DnDeeples container. It turned out there wasn’t enough space. Instead, I used the original VP jewel container for the coins and built a second container for the jewels that sits on top of the buildings. I would have liked a larger container for the coins but it doesn’t really matter all that much because I actually use metals coins when I play instead of the included cardboard coins.
The bottom level contains everything for the expansion and really doesn’t take up much space at all. The left side is Undermountain and the right side is Skullport. The middle is for the additional adventurer markers and can be used with either expansion.
If you look closely, you’ll notice the wall configuration for each expansion module is slightly different. Part of me wishes I would have made them look identical, however the Undermountain expansion just doesn’t take up as much space. So I instead decided to make the card sections a bit bigger for Undermountain and left an open section on the bottom left.
Lesson Learned:
1. Here is a simple tip that I probably should have put higher in the list. When making cuts, especially long cuts, it’s usually better to make a light cut first and then go over it again with more pressure. In other words, don’t try and make the long cuts all in one pass. I’ve found it much easier to make 2 or 3 passes instead. If you watch the videos on the Esoteric Order of Gamers website, they mention this as well and show you what I’m talking about.
2. When designing sections that will house cards, my personal preference is to make them a bit longer or wider so you have room to get the cards out. The alternative is to leave an open section on one of the walls (as I did with the Skullport cards). This will work when space is limited, but it takes a little longer to build and is not as easy to remove the cards as the first method. It sure does look neat, though!
Check out Jonathon’s full Geek List of insert design here.